AION 2 Global - Guides
Classes

Dungeon bosses

The mechanics that wipe a group, boss by boss, with arena diagrams.

From BIGSKALA's walkthrough of the launch dungeons (recorded on the Taiwan servers, September 15); dungeon and boss names from the global client. Every block links to its moment in the video. Diagrams are simplified sketches, not maps. BIGSKALA

Expedition: Conquest

5-player dungeons. Required GS is for Conquest; Exploration of the same dungeon opens earlier.

  1. GS 700Krao Cave
  2. GS 700Draupnir
  3. GS 1400Urugugu Canyon
  4. GS 1400Vakron Sky Island
  5. GS 2100Fire Temple
  6. GS 2100Ferocious Horn Den

Krao Cave

Required GS: 7005 players▶ 1:00

The first two bosses have nothing that kills you outright — dodge and keep hitting.

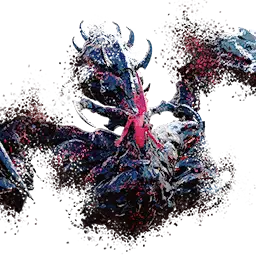
Ultimate Berk

Final boss ▶ 1:12

Boss in the middle, four rocks at the edge; stand in the green shadow behind a rock.

wipe Hide behind the rocks ▶ 1:15

The boss flies to the middle and four rocks appear at the edges. While he casts, everyone hides behind a rock — the green area behind each one is safe. Anyone left in the open is one-shot. Watch his cast bar.

Bleeding spin ▶ 1:33

After a pizza-slice hit, bright sparks flash around him and he spins after one player, adding bleeding. Stay out of his path; new players can burn a dodge, a potion or an invulnerability here.

wipe Stagger bar ▶ 2:03

When he raises his claws a stagger bar appears — break it fast or the group dies. Save your stagger skills for this moment; a broken bar stuns him for a few seconds of free damage.

Draupnir

Required GS: 7005 players▶ 2:30

The two bosses on the way are simple; the final worm is about timing your jumps.

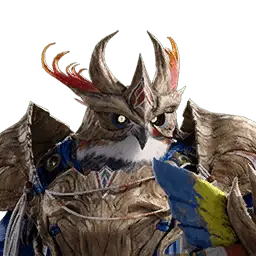
Transcendent Bakarma

Final boss ▶ 2:42

⤴⤴⤴⤴
Start at the edge, jump the rings, finish next to the boss.

wipe Waves, then the stun bar ▶ 2:45

The screen goes black and everyone lands at the edge on opposite sides. Waves roll out from the boss: run in at once and jump each wave (Space) to reach the safe zone right next to him — gap-closers of Gladiator, Chanter and Assassin help. Then break the stun bar immediately: a slow group runs out of time and wipes.

Dive and scatter ▶ 3:36

He dives and attacks every player separately — keep moving and spread out. A big area hit ends the phase: just get out of it. Near the end the wave phase repeats with tornadoes on the water to run around.

Urugugu Canyon

Required GS: 14005 players▶ 4:06

Guardian Captain Raur

First boss ▶ 4:09

At times he lowers his shield and a big damage zone appears under his feet — stop hitting him and run well away until it ends.

Judge Urahum

Second boss ▶ 4:21

Simple: he enrages and gets faster in movement and attacks.

Divine Auldor

Final boss — the bird ▶ 4:27

Winds in front ▶ 4:30

His winds hit in front of him — stand behind. If they catch you, he lifts you in his beak for a few seconds and slams you into the ground.

Arrows from four sides: the whole group stacks inside the marked circle.

wipe Marked player: share the hit ▶ 4:45

He flies up, marks one player with his eye and a small field grows around them, with arrows pointing in from four sides. Everyone runs into that circle and splits the final hit, or the marked player dies. Avoid the wind lines on the way. In the second phase he does the same from the middle, with a vortex around the arena.

Vakron Sky Island

Required GS: 14005 players▶ 5:21

Running through the dungeon gives a debuff with three levels; at level 3 roots hold you and hurt — supports hit the roots to free you. Clear the debuff at a fountain.

Tiere

First boss ▶ 5:45

Kill the flower; move together so the poison stays behind you.

Poisoned arena ▶ 5:48

She retreats to the middle and poisons everything but a small circle around her; a flower blooms inside — kill it to clean the area. She throws poison at every player and it stays on the ground, so the whole group moves together in one direction to keep a clean patch.

Thamon

Second boss — the boulder ▶ 6:21

Stone circles ▶ 6:24

Light circles flash under the players; stay in one and you turn to stone. The others break the stone fast, because a huge area hit comes right after and hits whoever is still trapped.

Red or purple ▶ 6:36

In the second phase he puts a vampiric buff on himself: red glow — melee stops hitting; purple glow — casters stop. Hitting into the wrong colour heals him a lot.

After him, find four spheres in flight mode and bring each to the statue of its element to open the way to Vakron.

Vakron

Final boss ▶ 7:03

The seed ▶ 7:03

He throws a seed at a player; a few seconds later it roots them in spikes with heavy damage over time and spreads to anyone close. The seeded player steps out of the group — not too far, so the others can still hit the spikes and free them.

Jump the three rings; the red lines are the attacks from the centre — stand between them; glide over the final blast.

wipe Red floor: three waves and a blast ▶ 7:15

The whole floor turns red. Three waves roll out from him — jump each one. At the same time attacks shoot out of the centre along lines in every direction, in two sets that take turns: stand between the lines of the next set. A moment after the third wave a blast covers the area: dodge it with a jump too. The easy way: on the third wave jump, press Space again and glide, and the blast passes under you.

Break the red rock, leave the circle through its gap.

wipe The red rock ▶ 7:45

He goes to the middle and pulls everyone in; rocks grow around him and one is reddish. The whole group breaks that rock and runs out of the circle through the gap — if it stays, everyone dies.

Fire Temple

Required GS: 21005 players▶ 8:02

Bring yellow potions for debuff removal and set Chanter and Cleric skills to the cleanse picks. This is the fastest dungeon and the one you will farm the most.

Kromede's Desire

Final boss — Kromede ▶ 8:44

Bow up, bow down ▶ 8:44

Bow raised: arrows rain on every player — keep moving. Bow lowered: balls fly out in several directions and debuff whoever they hit. Then she leaps from player to player with area hits, and later a three-stage leap whose radius grows each time.

One window per wall, never in the same place: zigzag through.

wipe Walls of fire ▶ 9:30

She flies up and walls of fire sweep across the arena with one safe window each. The windows jump left and right, so turn early — with high ping, start turning before you reach the wall. Heal and use invulnerabilities; surviving is all that matters. The second time, fireballs fly around the arena too.

Clones ▶ 10:12

She moves to the middle and illusions appear that attack fast, then close in and hit an area together — dash or run out of it. After the second fire walls more illusions shoot fire arrows from the edges.

Ferocious Horn Den

Required GS: 21005 players▶ 10:51

The dungeon for armor pieces and the guard.

Watchdog Kwapo

First boss — the wolf ▶ 10:54

He jumps around the arena while area hits rain down, then fireballs appear: collect them fast — each one slows you more. At the end he releases a wave from the middle (jump it) and every ball nobody picked up explodes.

Necromancer Duanka

Second boss — the necromancer ▶ 11:36

Before him: a totem room — grab bombs from the stairs on both sides (three at a time) to clear the adds. He summons four souls; one player (usually a ranged one) takes an orb so the group can damage them. He marks a player and stands on them with heavy damage — the supports share it in the circle. At the end he pulls everyone in and spreads the zone: run out and dodge the souls flying to him.

Ferocious Horn Nuakum

Final boss ▶ 12:27

Illusion leap ▶ 12:48

He jumps onto his statue, marks and roots a player and his illusion jumps away from them while a circle grows. Read the arrows: small circle — the supports run in; large circle — they run out. One more player stands in the illusion's path, or its damage-taken debuff kills the marked player when the wolf lands. Two jumps the first time, three the second.

Boss, orb and marked player on one line.

wipe Redirect the strike into the orb ▶ 13:42

He casts an orb in the middle that pulls players slightly, jumps to the side and marks a player. The marked player runs to the opposite side, through the area hits, so his ranged strike passes through the orb. Three hits out of four attempts must go into the orb; he jumps somewhere new every time.

What's new

  • After 45: SywoGG's gear route — item level milestones from 700, clash runes, the story bracelet, belt and amulet, arcana math, Fire Temple, gear past +15 and where else combat power comes from. Also fixed for global: Shugo cards by place, Nightmare attempts and the Nightmare shop.

Full changelog →

Send feedback

What is wrong or outdated, or which guide should be added? A link to a source or a screenshot helps a lot.

Sent together with the message: